
Earth plaster is by far my favorite part of working with straw bale construction. Although I am a pretty good gopher in terms of stacking, pinning, sewing, etc., earth plaster is where my talent comes through. (Which is pretty funny, since I had no idea I would be any good at it!)
For those of you familiar with Terra Dei (www.lutherlyn.com), it is plastered with two layers of cement stucco, followed by two layers of Thoro stucco. It worked well, but it was very heavy to trowel onto the bales. For Haven Homestead, we tried our hand at mixing our own earth plaster. I'll run through our basic recipe and technique for mixing earth plaster here at the homestead.
Without at doubt, this was one of our best investments:

(If you were working on a small project, such as a shed or a coop, you could probably get away with renting a small cement mixer. However, it only made sense for us to purchase our own when we were building Haven.)
Fred learned our basic recipe for earth plaster from a workshop led by Sasha Rabin at Yestermorrow in Vermont. As with all good recipes, we did a little tweaking to find the perfect mixture.
Haven Homestead Earth Plaster
We use a 1:1:1 mixture of brown clay, mason sand, and chopped straw. Using 5 gallon buckets, we usually place two buckets of clay and two buckets of sand into the cement mixer. Once those are combined, we start adding water in small amounts. (I don't measure water when I mix. Today Fred did, and he estimates that he uses 1/2 of a 5-gallon bucket in this recipe.)
Once the water is in and the mixture is really soupy, start adding two buckets of chopped straw, a few handfuls at a time. Once all the straw is added, it will be heavy enough that it will start to peel off the side of the mixer in sheets and thump into the bottom as it turns. That's how I know it's done. We use a small child's wading pool at the base of the mixer to collect the earth plaster as it's made. If you line the pool with a large sheet of plastic, you can make many batches at once and wrap the plaster up at the end of the day. It will keep for weeks stored this way.
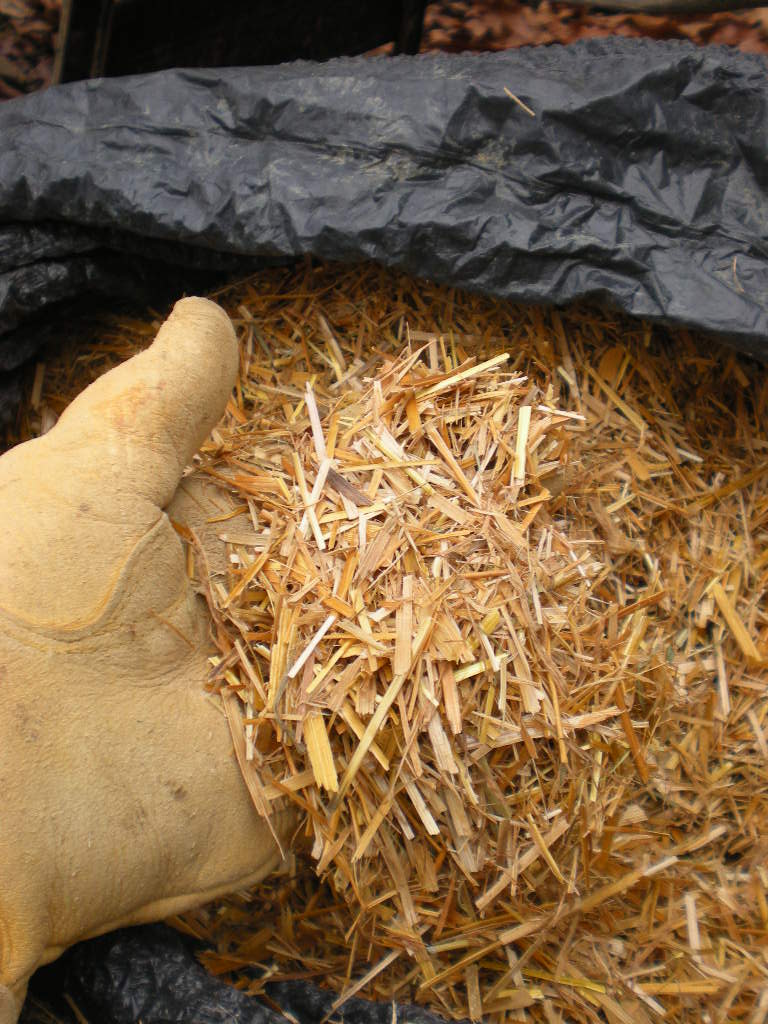
This is a picture of the straw, chopped into 1/2" to 1" pieces. Fred accomplished this by using a chipper shredder attached to a lawn tractor. (At this point, I should note that it can be a good idea to wear a mask when chopping straw or mixing the straw into the sand/clay mixture. The straw is very dry and dusty from being chopped. If you don't wear a mask and breathe in the dust, you can end up feeling like you're coming down with bronchitis.)
This is a bucket of slip, clay mixed with water. (I make mine my putting two shovels of clay in a five gallon bucket & adding four to six inches of water. Using a mixing attachment on the drill, it's quick & easy to make.) Before you try to apply earth plaster to your bales, it is very helpful to "paint" the bales with clay slip. It helps the plaster adhere.

In the left of this photo is a pool trowel. (Masons use them when spreading the sand out in the foundation for swimming pools.) The rounded corners make a pool trowel much easier to use than a traditional trowel. Having said that, I don't usually use a trowel at all when I work with earth plaster. I use my hands.

Because the clay is so drying to your skin (and because the straw and wire can poke your fingers), I find gloves to be essential to a happy day of plastering. My favorite pairs of gloves are from Home Depot. I don't remember the brand. They were sold as ladies' gardening gloves, so they fit my hands really well. More importantly, the palms are coated with neoprene. This is very important, because if you use uncoated gloves, the plaster tends to stick to the glove instead of the wall.

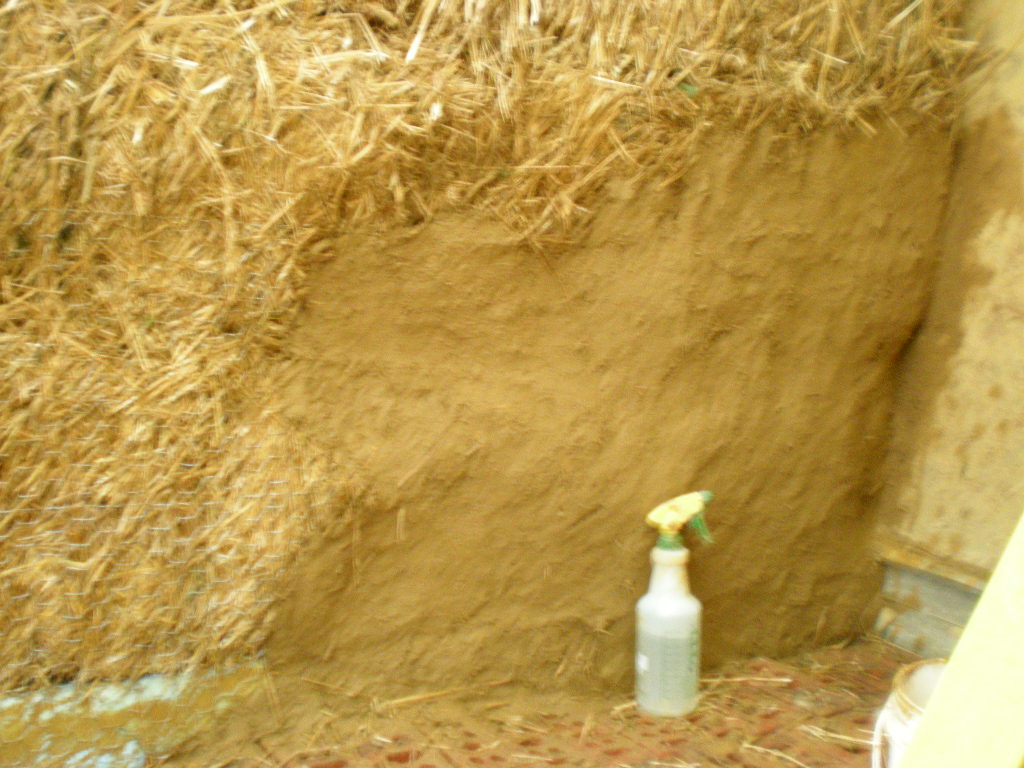
My first day of plastering the chicken coop, one hour in:
Update on chicken coop cost: We are still holding tight at $252, again, only because the materials shown are left over from building our house.
Thanks again for joining me on this journey! As always, feel free to comment or ask questions if you would like more technical straw bale details.
No comments:
Post a Comment