Showing posts with label straw bale construction. Show all posts

Tuesday, March 9, 2010

Pushing the Envelope

(In order to appreciate the events from this past weekend, the reader will want to remember that our straw bale home is currently heated by our backup system, a radiant floor fueled by propane. It's a great incentive to complete our Finnish masonry heater this summer for use in Winter 2010-2011.)


It was inadvertent that we were able to test the passive solar and insulative values of our home last weekend. We really meant to order the propane last week. Really. But it's getting to be good maple weather, which means busy times at home and work.

So we called for propane on Saturday. Sure, they'd be willing to deliver, for an extra $150.00.

Ah. Okay then.

So Saturday began with a feeling of regret that quickly turned into opportunity. As I've mentioned before, the insulation value of the walls of our home is quite high compared to conventional construction. We've created an efficient "envelope" (highly insulated walls, floors, ceilings, windows & doors.) We have a nice amount of passive solar gain through our south-facing windows and a decent amount of thermal mass in the floor. (In layman's terms, thermal mass refers to the ability of a material to absorb heat, to be radiated out over time.) But here's the thing---even though we theoretically knew the insulative value of our home, we had never tested it directly by turning our heat off---until this weekend.


By Saturday morning, we knew we needed to get through two days without using much propane, so we turned the radiant floor system off. (The radiant system works through a thermostat that measures the floor temperature and uses hot water---heated by propane---to keep the floor a constant temperature. The heat from the floor radiates upward and heats everything in its path.) The nice thing is, we can adjust the thermostat to decrease the temperature of the floor, but it also has a switch by which we can simply turn it off.

Looking back, I wish I had treated this weekend more scientifically and taken air and floor temperatures each hour. But anecdotally, here's what happened: we had typical maple weather all weekend, so outdoor temperatures climbed to around 45 degrees F during the day and dipped below freezing at night for both Saturday and Sunday. Each day, the passive solar energy raised Haven's interior temperature to around 69 degrees. Overnight, the air temperature in our home came down to around 64 degrees.

Overall, we were extremely pleased with how we fared at Haven this weekend. There were a lot of variables at play, such as the fairly pleasant March weather with sunshine. (Certainly, if we hadn't had sun, the house wouldn't have been as warm each day.)

So what are the potential implications of our inadvertent experiment? My conclusion is that since I am home during the day, I'll be able to monitor the outside weather and adjust the thermostat on our radiant system accordingly to greatly reduce our demand for propane on sunny days. It makes me think back to a Cape Cod we used to own, to times when we considered ourselves lucky to be able to turn the furnace off toward the end of April. What a great opportunity to be able to reduce our fuel use a month and a half earlier! It also brought me back to our time at Terra Dei, learning to build smaller fires each day as Spring progressed, so as not to waste wood and overheat the house.  It reminded me that life it built on a learning curve.

The owner of the propane company personally made our delivery yesterday. Having helped Fred choose the size and site of the tank for our proposed radiant heating system, he was curious as to how we made out this winter. I described how pleasant the floor was to walk on, then related our "experiment" from turning the system off this past weekend. He smiled ruefully, saying, "Well that's great for you, but not good news for me!" Though I kept quiet, I was dying to say, "Just wait until our masonry heater is in place next year!"

Instead, I chose to smile and wish him a good day.

Thanks for joining me along our journey!
Grace
xxoo

Monday, February 15, 2010

"10 Outrageous Homes" (again!)


A friend sent me a link this morning that I'd like to pass along. If you are a fan of straw bale construction, you'll want to take a minute and visit this slideshow of ten beautiful homes. I found the spiral house in Denmark to be especially interesting.

http://realestate.msn.com/slideshow.aspx?cp-documentid=23420141&GT1=35000

Enjoy!

(*My apologies for anyone who visited earlier. The link was not correct, but it has been fixed!)

Sunday, January 24, 2010

On the Horizon: Straw Bale Workshops

While proofreading the newsletter for the environmental education center at Lutherlyn, I was thrilled to note that plans have been set in stone for three straw bale workshops this spring. Lutherlyn is in the process of building its second straw bale structure, a worship and music center. (Terra Dei was Lutherlyn's first straw bale building, to which we credit our early straw bale experience and where we lived for four years.)

March 21-27, 2010: Join us for an Alternative Spring Break focusing on straw bale construction. This week-long program will introduce students and campus groups to the basics of straw bale construction and earth plastering.

May 14-16, 2010: We will be offering a combination Straw Bale Construction and Earth Plastering Workshop. This event will cover the basics of design, construction, and finishing of straw bale walls. It will include plenty of hands-on experience.

May 22-23, 2010: Come for our Straw Bale Work Days! These days will be spent stacking and plastering bales. All volunteers are welcome to attend.

(On a side note, yours truly will be helping teach these events. I can't wait to get my hands on that earth plaster!)

For more information and to register for these events, please contact the LEEP office:

Lutherlyn Environmental Education Program
724-865-9079
leep@lutherlyn.com

Thursday, January 21, 2010

Making the Move!

Last we talked about the straw bale chicken coop, Fred and Granddad had put the metal roofing in place. It was Thanksgiving. Winter decided to arrive in earnest the following weekend:


So after the big push during October and November to get the coop done, we were unable to move the hens down to Haven after all. Everything came to a very cold standstill. (Cold and dark, but oh-so-beautiful!)


Our driveway is about 1/4 of a mile in length. Not a big deal; actually, a pleasurable walk to the mailbox. But without a 4-wheel drive vehicle, winter becomes a test of patience. I have a tendency to get vehicles stuck in snowdrifts, so I park up at Great-Grandma's on the main road instead of getting stuck in our driveway.

But the early grasp of winter always gives way to a January thaw, which hit last weekend. We had a nice stretch of days ranging from 25-35 degrees Fahrenheit, which means that most of the snow melted. It was time to move the girls!

I wish I could say they were excited for their move. They weren't. We moved them five at a time in a cardboard box, with lots of squawking for effect. But all that seems to be forgiven and forgotten. They are glad to be home!


See how excited they are? (I know, chickens don't often get too excited, unless it involves treats.) A better word to describe them is content. They are content to be scritching around in the earth without a fence.


Here is a picture of the interior. The right side features food, water, and roosts:


The door opens to their nesting boxes on the left:


Yesterday was their first day to run free for hours. They were as happy as could be. Due to the large overhang of the roof, they found a dry, dusty spot. For a better part of the afternoon, all ten chickens were crammed into four square feet of dust:


Some of you may remember that we actually have 12 chickens. Two chickens opted to stay up at Great-Grandma's. My sweetest little chicken has been picked on by the largest hen. (And therefore, by all the others. They don't call it a "pecking order" for nothing!) Unfortunately, the flock has pulled out a good many of her feathers on the back of her neck, around her tail, and on her lower back. We thought that warranted a break, so she and a friend are going to stay at the other coop for some well-deserved rest time.

You can see from the pictures that we still have work to do on the coop, even though the chickens are living there. Two major improvements still need to take place. The first is to apply the rest of the mud plaster to the outside of the coop. I should be able to finish the two unplastered exterior walls with two good days of work. The second improvement is to run permanent electricity and lighting to the coop. For my friends who don't do chickens, egg laying drops dramatically in the winter if you don't have an indoor light to help them out a little. Electricity would also give us the option to use a heated waterer during the coldest months. We have to run electricity to the garage anyway, so it will be just a small job for Fred to extend that to the coop.

So for now, until winter comes to a close, that means taking warm water out to the girls a few times a day so it doesn't freeze. Compared to the 1/4 mile I was carrying water to their other coop, this is a dream. It makes me very happy to open my door and hear them calling to one another. It makes our homesteading life seem just that much more complete, to have our girls with us under their own little blue roof.

Tuesday, December 15, 2009

Seriously, Why Straw Bale?

When I began working on my radiant floor post the other day, I realized that there are so many other posts I need to write for the sustainable part of this blog---top of the list being reasons why a person would try to build a house out of straw. Living in our particular part of the northeastern United States, straw bale construction isn't something you see often. The only exposure most people in this region have to green building is what they may have caught on HGTV. That makes teaching with homes like Terra Dei and Haven Homestead a special joy. To take a visitor from the mindset of "Why on earth would you want to build with straw?" to "Boy, that's pretty cool," is a gift we're blessed to give. Our aim is to share open-mindedness, possibility and vision, not to convince visitors that they could or should build a straw bale house.

Here's the thing, the answer to "Why build with bales?" has already been published many times by experts in the field. Not being one to reinvent the wheel, what I'd like to do is give you a rundown of a list compiled by Paul Lacinski and Michel Bergeron, from their book, Serious Straw Bale. In their first chapter they list eight excellent reasons why building with bales is a viable alternative to conventional construction, as listed here.

1. Beauty
I love that this is the first benefit they give for building with straw, because beauty itself attracts me most to straw bale construction. The combination of straw walls and earth plaster could perhaps be considered the antithesis of conventional home construction---both in types of material and in aesthetics. There is a subtle beauty to a bale wall, seen in the gentle curves and in the way the light falls on the plaster throughout the day.


The above photo is from one of my favorite spots in Haven. Note the rounded windowsills, the deep ledge where one can curl up with a blanket and a book. Above the chair, a truth window bears witness to the origin of the wall.

2. Insulation Value
According to Lacinski and Bergeron, "Plastered bales provide a highly insulative wall at a price that is competitive with quality conventional construction" (p. 5). In layman's terms, bale walls can provide more insulation than conventional walls for around the same cost.

3. Nontoxic
In a world that we have increasingly filled with pollutants, this is a fundamental reason to choose straw bale construction. Straw is a natural material. "Unlike many manufactured building products, they [straw walls] contain no toxic ingredients and are chemically stable. They will release no unhealthy chemicals into your home, and will not emit poisonous fumes in case of a fire" (p. 9). At Haven, we did our best to choose nontoxic building/furnishing materials within our budget at every step. Straw and plastered walls were an early part of this continual process.

4. Use of Resources
When you choose to build a home, you are choosing to use resources. Your choice is to reuse material from previous construction or to use new material. We did some of each. Straw is a new material, but it is one that is readily available in our area. It can be grown in one season. In some locations straw is actually burned in the field as a waste product of agriculture. By using straw, "we might also reduce the pressure on forests (the most important carbon sinks and oxygen producers on the planet) and the demand for relatively energy- and pollution-intensive industrial insulation materials" (p. 10).

5. Economical
In these tight economic times, cost is a factor in everything we do. (Had we known what the last four years would bring financially, I don't know that we would have chosen to build when we did, if at all.) Our family was rapidly outgrowing our two bedroom Cape Cod house at the time. We were faced with buying a larger existing home, building a conventional home or building a straw bale home. We chose to build a straw bale home because we have experience in this area. We knew that if we did most of the construction ourselves we would save money in the process. Building our own straw bale home would allow us to obtain "much more home for our money", as the popular saying goes. According to Lacinski and Bergeron, "Bale construction is getting to be cost-competitive with good-quality stick-framed construction, assuming a tight design that doesn't drive labor costs through the roof" (p. 10).

6. Owner-Builder Friendly
Aptly written, these authors describe straw bale as "well suited to a 'gang of friends' method of construction" (p. 12). Especially for raising the walls, many hands make light work. We were able to place the bales for the first floor using two work weekends. Along the entire journey we have been fortunate to have good friends and family members who took our venture as their own and have been intricately involved in the construction and finishing details of our home. Working with friends saves time and money. More than that, it allows you to build more satisfying relationships with people you thought you knew well prior to building.

7. Fun
Different people have varying ideas as to what constitutes "fun". I wouldn't say that I particularly enjoy many of the jobs in construction, until you get to mudding and plastering the walls. For me, those jobs contain a great deal of creative fun! That is one of the fabulous parts of building your own home: people are free to try out a vast number of different jobs and see what they enjoy the most. There's also something to be said for the "synergy of group effort" (p. 12), stepping back and saying, "Can you believe we accomplished all this together?"


The above photo is an example of my idea of fun. This is the inside of my front door, which leads into a mudroom. Note the rounded walls next to the door, the curve of the interior corner! We were near the end of the interior plastering, and the bare wall was begging for some variation. My inspiration for cutting a niche into the bale wall was taken from Athena and Bill Steen's book, The Beauty of Straw Bale Homes. Todd used a chainsaw to carve into the bale. I used earth plaster to shape a triangular shelf, and the Trinity niche was born. The small mudroom was also the perfect place to apply a darker color of plaster---just for fun.

8. Durable
Bale buildings have been created for almost as long as the baling machine has been in existence. Much of the durability of bale walls comes from proper finishing with some type of plaster. When detailed correctly they are actually fire resistant; "plastered bale-wall systems have outperformed wood-framed walls in fire tests" (p. 13). Rodents and insects have a hard time finding a home in a wall that has been plastered and sealed off. Though we don't worry about it in our area, bale walls have even been tested and considered a viable option for earthquake-prone areas (p. 15).

Many thanks to Paul Lacinski and Michel Bergeron for sharing their collective experience with us in Serious Straw Bale. It is well known in straw bale circles and a book we trusted throughout the building process.

I will say this: the experiences I have had building two different straw bale structures has changed my life for the better. Not only have we created beautiful, safe, warm homes, I have personally learned many different construction skills along the way. An exerpt from the Christmas letter I typed last night: "Words cannot express how we’ve grown closer as a family simply because we endured the building process. The house becomes an excellent metaphor for building our life together, of taking separate agendas and meshing them into one structure that can hold us all."

That's not to say that everything along the building journey has been easy. On another day, I'll be sure to compile a post of "Boy, I wish we had known xyz about building," or "Yeah, that wasn't our best idea." But for today, from the office where I sit, I have a pretty optimistic view of our Life Under a Blue Roof. Thanks for sharing our journey!

Have you ever visited or built a structure of straw bales? Post a comment and let us know!

Wednesday, December 9, 2009

Living the Radiant Life

Living in a straw bale house, we get a lot of questions. These range from the comical "Three Pigs" type allusions, to the more serious, "Isn't it a fire hazard to have straw in your walls?" Once people realize that the straw serves as insulation, they want to know how warm the house is. As in all the homes we've lived we keep the temperature around 68 degrees Fahrenheit. We could certainly keep it warmer, but we try to treat heat as the valuable resource it is. Hence my ever-growing collection of wool cardigans.

When people ask how warm our house is, I think what they really want to know is how much energy we are saving. Until we've lived here a year we won't have a definitive answer to that. According to Chris Magwood in his book Straw Bale Building, "Insulation values (commonly referred to as R-values) for conventional residential wall systems typically range between R-12 and R-20, depending on climactic conditions. Straw bale walls have R-values between R-35-R-50, depending on their width." In that way, using straw bales for insulation has allowed us to significantly reduce the amount of energy required to heat and cool a house this size.

Haven Homestead is designed to operate on two heating sources. The first is a radiant floor system, fueled by propane. The second is a woodburning Finnish masonry heater. These two heat sources will work together in the future; the masonry heater is not yet online. We look forward to firing it up next winter, fueling it with wood split from our homestead. This will allow us to dramatically reduce our reliance on propane.

There are many positive aspects of living with a radiant floor. Extremely quiet systems, we don't hear the rush of the furnace turning on, the drone of air whooshing through a register. Gone are the days of itchy skin and nosebleeds from air that is overdried from a forced air system. Radiant systems are also hidden from sight in the subfloor; not only visually pleasing, this also makes them extremely childproof. They aren't prone to large fluctuations in temperature and distribute heat evenly.

For those of you who may have never experienced a radiant floor, ours is an open direct system designed with components from the Radiantec company based in Vermont. "The system uses one very efficient water heater to make domestic hot water for the home and warm water for radiant heating. Radiant heating systems warm the building by locating heating tubes within a large surface area of the building and then circulating warm water through the tubes." (Radiantec Open Direct System Installation, pg. 1) When the construction of the masonry heater is complete the two systems will work in concert, with heating coils for the floor running through the fireplace. This will preheat the water before it arrives at the hot water tank, reducing the amount of heat needed (and the amount of propane used) to bring the water in the hot water tank up to the desired temperature.

Two of the largest advantages for us in choosing a radiant floor heating system were ease of installation and system cost. According to the brochure we obtained from Radiantec, "Installation of radiant heat does not have to be hard, and it does not have to be expensive." They go on to say, "Radiantec Company thinks that the task of installing underfloor radiant heat is the task of a reasonably competent handyman...and that the work can be done with common, readily available tools." I would consider their opinion correct on both counts. Though we did have a licensed plumber help install the hot water manifold, Todd and my father were able to complete the actual installation of the floor elements. Radiantec designed the layout; we placed strapping across the entire subfloor and laid the Pex tubing between the strapping members. We filled the cavities next to the Pex tubing with sand. (Sand was chosen for its excellent heat retention and relatively low cost, as well as the fact that it requires no additional manufacturing, as is the case with cement.) We covered the entire first floor with cement backer board and laid ceramic tile wall-to-wall.

Regarding system cost, our expense for purchasing the components of the system (Pex tubing, manifold, reflective barrier, couplings, pump, all valves, digital temperature display, pressure gauges, etc.) ran around $2,400. An additional $1,696 was needed to purchase the hot water tank, bringing the total component cost to $4,096. (Note, in an effort to save in construction costs, we opted for a less expensive water heater than the extremely efficient Polaris recommended by Radiantec, with the intent to replace it with a Polaris in the future.) At the time we purchased the materials for our system a comparable conventional baseboard hot water system would have cost us approximately $6,500 (Radiantec Heating Systems, pg. 3).

Although it was not my intent to turn this post into an advertisement for Radiantec, we've been very pleased with our team effort to design and install Haven's radiant floor. Radiantec is a member of the International Code Council. They offer assistance designing systems, help with materials specification, and provide detailed installation manuals. They also provide unlimited toll-free technical support for as long as you own your system. Our house is warm and draft-free. As our son is often wont to do, you can walk across the ceramic tile in your bare feet in winter with a level of comfort.


Taken just this morning, featuring Batman pajamas and bare feet.

Resources:

Magwood, Chris and Peter Mack. Straw Bale Building: How to Plan, Design and Build With Straw. Gabriola Island: New Society Publishers, 2002.

Radiantec Incorporated
Box 1111, Lyndonville, Vt 05851
(800) 451-7593
FAX (802) 626-8045
www.radiantec.com

Tuesday, November 24, 2009

Straw Bale Coop (Part Seven): Raising the Roof!

Many thanks to Granddad and Fred, who donated a few hours on Saturday to place the roof on the straw bale coop!


Leftover metal roofing from Haven, cut to size & slid into place.


A view from under the roof. You can see the large overhang, which will help keep the bales dry.


Chicken wire is stapled into the top plate (the two-by-four that rests on top of the bales) and will be pinned into place before mudding.


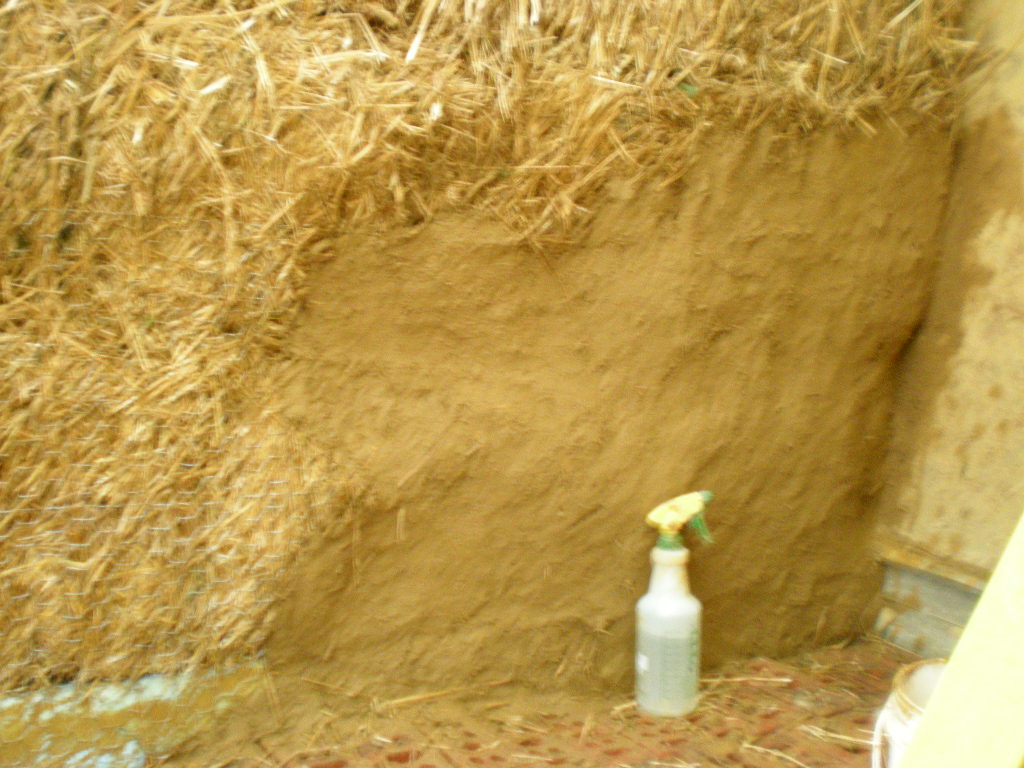
This is the southern wall of the coop, which Jewel and I plastered while listening to the Steeler game on Sunday afternoon.


Today I was able to plaster the lower two courses of bales on the north and east sides. We are running low on chopped straw (an element of the plaster), and I wanted to "chicken-proof" the wall in case we aren't able to finish the upper plastering anytime soon. (From the way the girls will tear into flakes of straw in their bedding, I was afraid to leave unplastered bales within beak range.)

So today, I'm feeling thankful to my family, who has been so supportive during this project. We are at a good place to stop with the holiday weekend approaching.

God's blessings to you and your family, at Thanksgiving and always!

Sunday, November 22, 2009

Plaster Pals...

At three and a half, getting to help run the cement mixer is a pretty exciting job...
Tuba Boy with Uncle T. (T practices law during the week, but for two years came every weekend to help us with Haven. He very kindly offered to come mix plaster for my coop.)


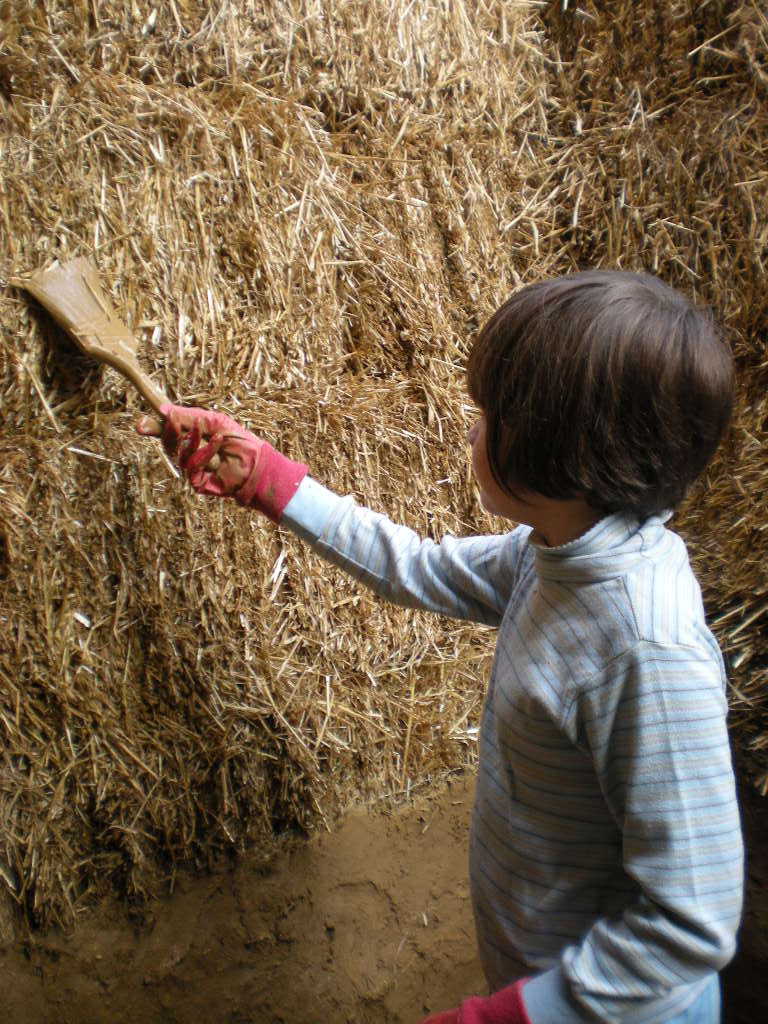
Jewel applies slip to the wall before plastering.


Rafters for the roof of the coop.


Jewel was a tremendous help with the plaster on the inside wall of the coop. At six and a half years old, she kept saying, "I'm good at this!" Which is how I often feel working with earth plaster. I never expected that I could be good at plastering, or that I would enjoy it so much!

Straw Bale Coop (Part Five): Pinning, cont.

When last we spoke, I had talked about pinning in terms of pinning the bales together vertically as you stack them in courses.

Once you have your bales stacked, it's very tempting to think that it's time to plaster the bales. However, at this point it is very important to "tie" your bales into the top and bottom of whatever structure you have built. This is one more way to add strength to your wall.

(For those readers who do not know me well, I have to reiterate at this point that I am not an expert in straw bale building. I lean on the experience of those who have gone before me as well as personal building experience. My husband and I have built two homes and a garage out of bales. If there is something I emphasize, it is usually because we have made a mistake and learned the hard way.)

Let's talk for a minute about holes.

Holes are not your friend. They result when bales are not exactly rectangular; when you have two slightly curved corners come together. You need to fill them, and you need to fill them well.

This is what a hole looks like. (I know, sounds pretty obvious.)


This is that same wall, a minute later, after I stuffed loose straw into the hole. I can't overstate how important it is to fill holes. If you don't fill them with straw, you'll be filling them later with handful after handful of valuable earth plaster. (If you're not planning to plaster your wall, perhaps opting to cover your wall with T-111 or a similar product, holes in your wall will greatly reduce the energy efficiency and warmth of your wall.)


To tie the bottom of our wall into our foundation, we used two-foot tall chicken wire. Pretty straightforward, we cut the wire to the length of your wall. We've used two methods in past construction for attaching the wire to the bale wall. First, you could "sew" the wire on using baling twine and a bale needle. Second, you could create a number of long pins to hold the wire securely in place. For this project, we chose to use pins.


At this point, it was important to assemble a large number of pins. (The ones in this photo were made out of coat hangers, snipped with pliers. Myhrman and MacDonald refer to these as "Robert or Roberta pins, to emphasize their size and status relative to "bobby pins", pg.92.)


Though it's hard to see in the photo, this is the same length of wall, with the chicken wire securely attached. A wall that is ready to plaster will have the chicken wire attached tightly; wire with gaps will be difficult to plaster.


When I attached the chicken wire at the bottom and at the framing around the door, I used poultry staples. (A staple gun can also be used. I find that the poulty staples are easy to use and provide a stronger hold. This is a photo of the poultry staple before it is pounded in.)


For my purposes, I was ready at this point to start plastering the inside of the coop. I still needed to "tie in" the top bale to the top plate of the roof, but that wasn't on yet.

Next post: earth plaster!

Straw Bale Coop (Part Six): Earth Plaster!

(This will be my somewhat-technical post on earth plaster. If you are a friend or relative looking for muddy pictures of the kids, you want the next post!)

Earth plaster is by far my favorite part of working with straw bale construction. Although I am a pretty good gopher in terms of stacking, pinning, sewing, etc., earth plaster is where my talent comes through. (Which is pretty funny, since I had no idea I would be any good at it!)

For those of you familiar with Terra Dei (www.lutherlyn.com), it is plastered with two layers of cement stucco, followed by two layers of Thoro stucco. It worked well, but it was very heavy to trowel onto the bales. For Haven Homestead, we tried our hand at mixing our own earth plaster. I'll run through our basic recipe and technique for mixing earth plaster here at the homestead.

Without at doubt, this was one of our best investments:


(If you were working on a small project, such as a shed or a coop, you could probably get away with renting a small cement mixer. However, it only made sense for us to purchase our own when we were building Haven.)

Fred learned our basic recipe for earth plaster from a workshop led by Sasha Rabin at Yestermorrow in Vermont. As with all good recipes, we did a little tweaking to find the perfect mixture.

Haven Homestead Earth Plaster
We use a 1:1:1 mixture of brown clay, mason sand, and chopped straw. Using 5 gallon buckets, we usually place two buckets of clay and two buckets of sand into the cement mixer. Once those are combined, we start adding water in small amounts. (I don't measure water when I mix. Today Fred did, and he estimates that he uses 1/2 of a 5-gallon bucket in this recipe.)
Once the water is in and the mixture is really soupy, start adding two buckets of chopped straw, a few handfuls at a time. Once all the straw is added, it will be heavy enough that it will start to peel off the side of the mixer in sheets and thump into the bottom as it turns. That's how I know it's done. We use a small child's wading pool at the base of the mixer to collect the earth plaster as it's made. If you line the pool with a large sheet of plastic, you can make many batches at once and wrap the plaster up at the end of the day. It will keep for weeks stored this way.


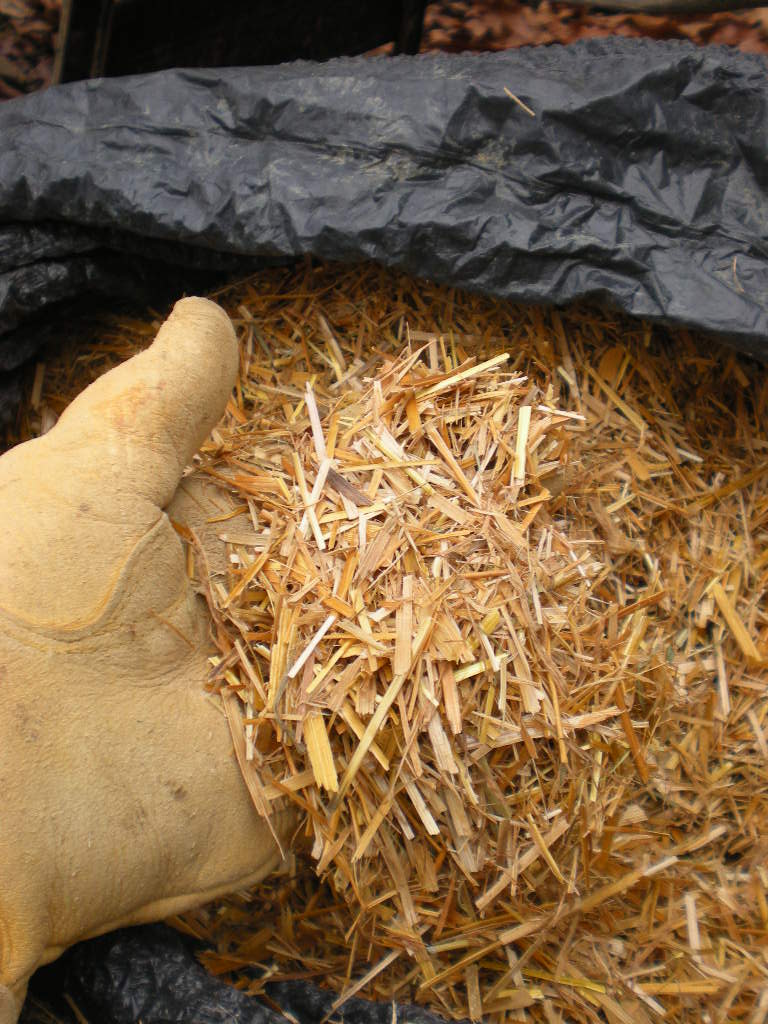
This is a picture of the straw, chopped into 1/2" to 1" pieces. Fred accomplished this by using a chipper shredder attached to a lawn tractor. (At this point, I should note that it can be a good idea to wear a mask when chopping straw or mixing the straw into the sand/clay mixture. The straw is very dry and dusty from being chopped. If you don't wear a mask and breathe in the dust, you can end up feeling like you're coming down with bronchitis.)


This is a bucket of slip, clay mixed with water. (I make mine my putting two shovels of clay in a five gallon bucket & adding four to six inches of water. Using a mixing attachment on the drill, it's quick & easy to make.) Before you try to apply earth plaster to your bales, it is very helpful to "paint" the bales with clay slip. It helps the plaster adhere.


In the left of this photo is a pool trowel. (Masons use them when spreading the sand out in the foundation for swimming pools.) The rounded corners make a pool trowel much easier to use than a traditional trowel. Having said that, I don't usually use a trowel at all when I work with earth plaster. I use my hands.


Because the clay is so drying to your skin (and because the straw and wire can poke your fingers), I find gloves to be essential to a happy day of plastering. My favorite pairs of gloves are from Home Depot. I don't remember the brand. They were sold as ladies' gardening gloves, so they fit my hands really well. More importantly, the palms are coated with neoprene. This is very important, because if you use uncoated gloves, the plaster tends to stick to the glove instead of the wall.


My first day of plastering the chicken coop, one hour in:


Update on chicken coop cost: We are still holding tight at $252, again, only because the materials shown are left over from building our house.

Thanks again for joining me on this journey! As always, feel free to comment or ask questions if you would like more technical straw bale details.

Friday, November 20, 2009

Acknowledgements

It ocurred to me (while mudding the coop interior) that I would really like to take a step back and acknowledge the resources Fred and I used to learn about straw bale construction. If not for the willingness of these authors and teachers to pass on what they have learned along the way, Terra Dei and Haven Homestead would not exist. Many, many thanks!!!

So without further delay...

Books:
Lacinski, Paul and Michel Bergeron. Serious Straw Bale: A Home Construction Guide for All Climates. White River Junction: Chelsea Green Publishing, 2000.

Magwood, Chris and Peter Mack. Straw Bale Building: How to Plan, Design and Build With Straw. Gabriola Island: New Society Publishers, 2002.

Magwood, Chris and Chris Walker. Straw Bale Details: A Manual for Designers and Builders. Gabriola Island: New Society Publishers, 2001.

Myhrman, Matts and S. O. MacDonald. Build It With Bales: A Step-by-Step Guide to Straw-Bale Construction. Tucson: West Press, 1999.

Steen, Athena and Bill. The Beauty of Straw Bale Homes. White River Junction: Chelsea Green Publishing, 2000.

Journal:
The Last Straw Journal
HC66, Box 119
Hillsboro, New Mexico 88042
(505) 895-3326
thelaststraw@strawhomes.com
www.strawhomes.com

Hands-On Learning:
Yestermorrow Design/Build School
189 Route 100
Warren, VT 05674
(802) 496-5545
www.yestermorrow.org

Straw Bale Coop (Part 4): Pinning

If you're visiting my documentary of building a straw bale chicken coop because you have an interest in poultry or in straw bale construction, then we have something in common! Please feel free to leave any questions or comments below.

(If you stopped by because you are a friend or family member, thanks for the support. I appreciate you so much!)

One of the important aspects of straw bale construction is weaving a wall that is tight and strong. There are many ways to lend strength to a wall, one of which is pinning as you go.

After we finished laying the second course of bales, we drove bamboo stakes down through to lock them into the first course. (I usually use two stakes per corner bale; sometimes you can get away with one stake if the bales are on a short wall.)


This picture was taken from the inside of the coop. I used a level and a soil rake to roughly even out the ground. Next, a layer of small to medium gravel was laid. Finally, I placed a rough floor out of red brick (reused from the chimney in my parents' previous house.) Once the coop is finished we will add a layer of hardwood shavings and start a deep-litter floor for the girls.


Fred and Granddad place the frame for the door:


No matter how confidently the weather forecaster predicts "No rain in sight," it's always a good idea to cover your project. (The day after this photo was taken, we were predicted to have a clear day, yet a small shower took place around 3:00 p.m. It always pays to cover your work.)


In keeping with previous coop posts, I should note that there were no additional expenses in this stage of building. Most materials and supplies were reused from the construction of our straw bale home.

Next post---how we tied the walls into the foundation.

Happy building! Thanks, as always, for stopping by.

Sunday, November 8, 2009

Straw Bale Coop (Part Three): Buying Local

One of the challenges we set for ourselves is to "buy local" if possible. According to research by The Food Institute and The Hartman Group in 2008, people tend to classify products as "local" if they are made/grown within 100 miles. Sometimes this is easy to achieve, as in the case of locally grown produce. Other items can be harder to come by.

Consider in this context two items I needed for my chicken coop: an exterior door and straw bales.

I was really hoping to find someone who wanted to sell me a used door. (Because really, it's for a chicken coop...) I checked Craigslist and Construction Junction (a nonprofit warehouse located in Pittsburgh specializing in reclaimed construction items.) Unfortunately, I was unable to obtain a used door. Before making a purchase at a big box home store, Graddad encouraged me to check with 84 Lumber. (Although a chain, 84 Lumber originated in Eighty Four, PA, approximately two hours from here.) When I spoke with Jon, the manager, and described what I wanted, he led me to a door that hadn't sold due to minor cosmetic flaws. He very kindly gave me the door for $102 (including tax), instead of the regular selling price of $150.


Would I define this as a local purchase? Not really. Even though I was able to patronize a smaller store with more of a local origin, I still don't know where the door was constructed and how far it had traveled to get to there. I'd bet my eye teeth it wasn't within 100 miles!

Contrast this with my straw purchase.

I had twelve bales left from Haven's construction and needed to purchase approximately 30 additional bales for the coop.

Shortly after we purchased our property, we were befriended by a dairy farmer named Mr. B. Though I believe we amuse the neighbors with our straw house and the desire to feed our chickens organic pellets, he and his family have always been very welcoming, ready to include us in neighborhood gatherings and willing to help us figure out the finer points of living in the country.

When I called Mr. B. and M. (his daughter, my friend) to see if they had any square bales, Mr. B.'s response was, "Come on over. We'll get you what you need, load it in the back of my pickup, and get it to your house." We offered the local going price for straw, $3.00 a bale, and also gave an additional $10 for gas and time.

(To keep us up to date with the cost of the coop:
$50 for cement; $102 for the door; $100 for straw. Total = $252.00)

Here's a picture of my straw acquisition:


And here's a photo of me with my friend Mr. B. It was great to obtain the straw I needed, but that pales in comparison to the friendship I value with Mr. B. and his family.


And that, I believe, is the twofold payoff of buying local. You get the measurable benefit of supporting families in your area and stimulating your local economy. More importantly, there is the intangible benefit of depending on each other, of growing together as a community.

And that's an idea in which I can believe.

Thursday, November 5, 2009

Straw Bale Coop (Part Two), An Essay in Photos

Our progress as of October 24th, 2009:


Hardware cloth serves two purposes: built-in varmint control and a way to tie the concrete block to the straw bales. Here, Granddad actually tucks the hardware cloth between the first and second courses of block.


Strips of roofing paper will act as a barrier between the bales and the foundation.


Pins will be used to hold the hardware cloth tight against the bales. These were made from wire hangers.


The bales in these photos are actually just holding the hardware cloth in place while we apply surface bonding cement to the foundation.


Misting the wall before troweling on cement...


We used QuikWall (from the Quikrete family), which is a surface bonding cement. This is the same type of product we used on the foundation for the duck house at Terra Dei.


Of all the jobs in straw bale construction, troweling is one of my favorites because it has a high payoff value. You can really see your progress!


These photos cover approximately one day's worth of work for two people. My dad tackled the job of retrieving, measuring, cutting, bending and placing the hardware cloth. (I helped a tiny bit holding it in place while he replaced the block.) The placing of the bales and cement troweling was a team effort with Fred.


In my last post regarding the coop I mentioned that we are trying to keep our coop cost as low as possible. Here's where we stand...

Straw bale structural consultation: Free, from my wonderful husband!
Aforementioned brown block: Free, thanks to Lutherlyn
Labor to dig the trench: Free
Hardware cloth: Free, scavenged from my old chicken tractor
Pins: Free, from old hangers
Roofing paper and straw bales: Free, left over from Haven's construction.
Surface bonding cement: Purchased from DuBrook at a cost of approximately $50.

We are currently searching for a pre-hung exterior door, which may prove to be the most costly part of the project. Having checked Craigslist to no avail, I currently have a call in to Construction Junction in Pittsburgh, a supplier of previously used building materials. Here's hoping!